
Most people cut their winter utility bill in three places: the thermostat, the air coming into the house, and the water heater. Start with a bill you can actually read, change two or three things you can do yourself this weekend, and then check the next bill to see what moved. Twelve steps, roughly an hour of setup for the first four, and most households see a measurable difference within one billing cycle.
Before you touch anything, it helps to know what you are dealing with. A gas furnace and a heat pump respond to completely different changes, and a leaky rental behaves nothing like a drafty 1920s house. This guide works for both, and it separates the free fixes from the ones that cost money or need a licensed professional.
Table of Contents
- What You Need
- Step-by-Step
- 1. Find the Largest Source of Winter Energy Use
- 2. Set a Realistic Winter Thermostat Schedule
- 3. Change HVAC Filters and Check the System
- 4. Seal Air Leaks Around the Home
- 5. Add or Improve Insulation
- 6. Reduce Heat Loss From Windows and Doors
- 7. Use Ceiling Fans in the Right Direction
- 8. Lower Hot-Water Use Without Losing Hygiene
- 9. Shift Laundry and Dishwashing to Off-Peak Hours
- 10. Manage Electricity and Heating Use Together
- 11. Ask Your Utility About Discounts and Assistance
- 12. Track Your Results and Repeat the Process
- Common Mistakes
- Frequently Asked Questions
- How much should my electric bill be in the winter?
- Why is my electric bill so high with a heat pump?
- How much money can you save by turning down the thermostat?
- Does turning off lights really save energy?
- What wastes the most electricity in an apartment?
- How do I get my utility company to do a free energy audit?
- Start With Your Next Bill
What You Need
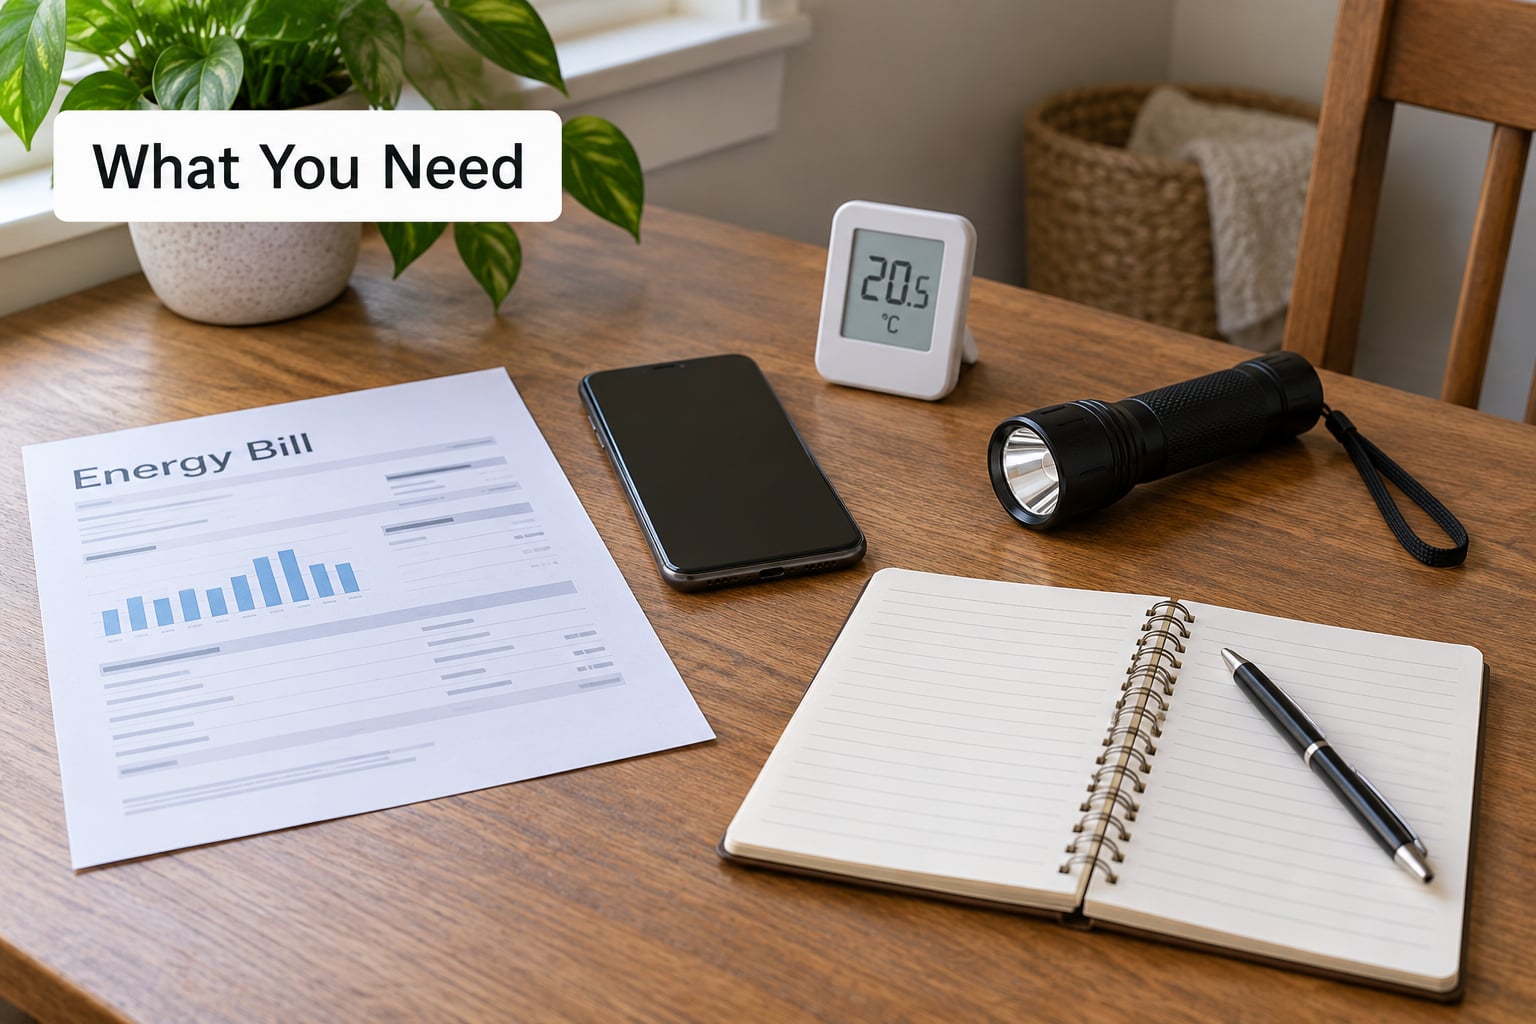
Gather paper before you gather tools. The list below takes about twenty minutes and it is what makes the rest of the steps measurable rather than guesswork.
- Your last three utility bills. Paper if you still get them, or a printed screen if you are a paperless customer. Three months lets you separate a one-off cold snap from an ongoing problem.
- Your thermostat model. The model number is usually on a sticker on the back or the base. It determines whether you have scheduling, learning, or only a manual dial.
- A month-by-month usage history from your utility’s online account, if it publishes one. Kilowatt-hours and therms are the numbers that matter, not the dollar total.
- Your heating fuel type. Find the furnace or heat pump label, or watch your meter for a week. Gas meters have a small spinning wheel; electric meters do not. If you are unsure, the equipment outside or in the basement usually says.
- A notebook or phone note. You will be recording thermostat settings and dates, and later you will want to line them up against the bills.
- Your local utility’s program list. Budget billing, weatherization assistance, low-income support and any smart thermostat or insulation rebate all live on the utility’s website, usually in a programs section.
- Basic tools for the no-cost steps: a flashlight, a phone with a flashlight app, weatherstripping tape, a door sweep, and a rolled towel for a temporary draft stopper.
Skip buying anything until you have done the first four steps. Most of the return in this guide comes from changes that cost nothing, and an expensive gadget will not outrun a thermostat set three degrees too high.
Step-by-Step
1. Find the Largest Source of Winter Energy Use
Open your last three bills and look at the electricity and gas lines separately. In most US homes, space heating eats the largest share of a winter energy bill, hot water comes second, and everything else together is smaller than either.
Then decide whether you have a spike or a pattern. One unusually cold month is weather, not a defect, and no behaviour change will erase it. Three months in a row above your neighbours tells a different story, and so does a bill where your usage rose while the weather stayed mild.
How to verify: write down your kWh or therms for each of the three months. You will reuse those exact numbers in step 12.
2. Set a Realistic Winter Thermostat Schedule
Set the thermostat lower when the house is empty and slightly higher when people are home. Most households land somewhere around 68 degrees during waking hours and a lower setting overnight, then adjust from there based on comfort.
Avoid big swings. Dropping the temperature twenty degrees and cranking it back up in the morning costs more and leaves you cold while the system works. Change it once, live with it for three days, then decide.
With a programmable model, set the schedule by hand first and only switch to a learning or adaptive mode once the manual schedule is working. Homeowners and renters alike report that misconfigured smart thermostats caused a higher bill before they caused a lower one, so verify the actual temperatures your system is calling for, not just the ones on your phone screen.
How to verify: look at your thermostat a week later. If it is calling for heat at 3 a.m. in an empty house, the schedule is not what you think it is.
3. Change HVAC Filters and Check the System
A clogged filter forces the system to work harder for the same heat. Replace or clean it according to the manufacturer’s instructions, which usually means every one to three months, and note the date.
While the system is accessible, walk the supply vents and look for furniture, rugs or boxes pressed against them. Blocked vents starve the room of heat and push the system to run longer.
Stop and call a licensed HVAC professional if the system short-cycles, blows cold air, or smells burnt. Same rule for anything involving gas lines, venting or a new thermostat wiring job.
How to verify: hold a hand at the register after the system has been running twenty minutes. Warm air means air is moving.
4. Seal Air Leaks Around the Home
Warm indoor air escaping and cold outdoor air coming in is pure loss, and it is the cheapest thing on this list to fix. Start with a flashlight at night and look for light coming through door frames, around outlet covers, and along the attic hatch.
For temporary fixes, rolled towels in the gap under a door or a removable weatherstrip are fine. For permanent fixes, choose the weatherstripping to match the job: foam tape for small gaps and irregular surfaces, metal or vinyl V-strips for door frames that need to close, and door sweeps for the gap under the door itself.
Do not seal combustion vents, dryer exhausts, or any flue. Blocking those can create a carbon monoxide risk, and that work belongs to a qualified professional.
How to verify: run the flashlight check again on a windy night. No moving light in the frame means the biggest leak is closed.
5. Add or Improve Insulation
Heat rises, so the ceiling and attic are where a winter house usually loses the most. Signs of thin attic insulation include a home that stays cold near the top floor while the first floor is fine, or visible gaps and pink or grey material between joists.
The same is true for a basement rim joist, which is a common weak point in homes built before the 1980s. For attic work, check your local recommended R-value for your climate zone rather than guessing.
Renting, or dealing with a knob-and-tube electrical system in the walls, means this one goes to a professional. Ask your utility about weatherization assistance programs first, since many cover insulation and air sealing at low or no cost for qualifying households, and ask for an energy assessment before spending money.
How to verify: an infrared camera rental or a professional blower door test shows exactly where the heat is going. Many utilities will run one free.
6. Reduce Heat Loss From Windows and Doors
Windows are usually the thinnest part of the wall, so they lose more heat than the wall around them. Close the curtains at night and open them during the day when direct sun hits the glass. That simple rhythm keeps free solar heat where you want it.
Removable window insulation kits, interior storm panels and thermal shades all help and are all reversible. They suit renters because nothing touches the frame permanently.
Permanent window replacement or exterior work mean cutting into the building envelope. Leave that to an insured contractor, and check whether your utility runs a window replacement program with a discount.
How to verify: on a cold night, compare the air right at the glass with the air in the middle of the room. A big difference is a window problem, and closing the curtain will tell you how much of it you can fix tonight.
7. Use Ceiling Fans in the Right Direction
A ceiling fan does not make heat, it moves it. Run it on the reverse, low, or winter setting and it will push warm air that has pooled near the ceiling down along the walls. Most fans reverse by flipping the switch off for a few seconds, or by pulling a chain on the housing.
The direction depends on your fan’s design. Look at the blades: running in the direction that pushes air up in summer and down in winter is the goal, and the manual for your specific model will show which way that is. Set it low so you feel circulation, not wind.
Turn it off entirely when nobody is in the room, and never use one in a ceiling that is not rated for it.
How to verify: stand below it and feel for air moving down the walls. If the air is moving up toward the ceiling, the direction is wrong.
8. Lower Hot-Water Use Without Losing Hygiene
The water heater is usually the second biggest winter energy user in a home. Dropping the tank temperature from 140 degrees to 120 degrees cuts the energy needed to keep hot water hot, and 120 degrees is enough for safe bathing and laundry.
Do not set it below 120. That is where bacteria risk starts, and scalding risk goes up as water cools in the pipes.
Then cut demand at the source. Shorter showers, cold-water cycles for most of the laundry, a dishwasher run on its eco or heated-dry-off setting, and fixing a dripping faucet all reduce hot water volume. Insulating accessible hot water pipes and fitting an insulating jacket on the tank also reduce standby losses.
How to verify: run the shower for five minutes and time it. Write the number down and check it again in two weeks.
9. Shift Laundry and Dishwashing to Off-Peak Hours
Some rate plans charge more per kilowatt-hour during the hours of highest demand, often weekday evenings. If your utility offers a time-of-use or rate plan, running the washer and dryer outside that window reduces your cost per load.
Check the plan before changing your habits, though. On a flat residential rate, the savings are close to nothing. If your plan has a demand charge, the peak window matters far more than any single appliance run.
How to verify: open your rate plan document and find the on-peak and off-peak hours, then check whether your current plan even has them.
10. Manage Electricity and Heating Use Together
This is the step where some households accidentally double their bill. Electric resistance heating and portable space heaters convert every watt into heat, which sounds efficient, but heating one room with a 1500 watt space heater for a few hours can cost more than you expect if the alternative was a house already at a comfortable temperature.
Electric blankets are a different story. They use a fraction of the power of a space heater, warm a person rather than a room, and cost far less per night to run. If you are cold at your desk or in bed, that is the first thing to try.
Never leave a space heater unattended, and keep it clear of bedding and curtains. Plug it directly into a wall outlet rather than an extension cord or power strip. And on a heat pump, learn the difference between auxiliary heat and emergency heat before you touch anything.
How to verify: check your thermostat for an aux or emergency heat indicator and note whether it lights up during a cold spell. If it does, step 11 and the next section are where your real savings live.
11. Ask Your Utility About Discounts and Assistance
Ask before you assume you are on your own. Most US utilities have some combination of budget billing that spreads the cost evenly across months, payment plans that smooth out a spike, free or discounted energy audits, weatherization assistance for qualifying households, and low-income or medical-need discounts.
Some states run their own rebate programs on top of the utility’s, and there are federal tax credits for qualifying energy-efficiency improvements such as attic insulation, windows, and high-efficiency heating equipment. All of it has deadlines, so check early in the season rather than in February.
Use the contacts on your bill. Ask specifically: do I qualify for weatherization assistance, is there a budget billing plan, what rebates exist for my equipment type, and can you run an energy audit on my account?
How to verify: get the answer in writing, and note the enrollment deadline.
12. Track Your Results and Repeat the Process
Compare bills before and after, and always adjust for weather. A January that was ten days colder than December will not show savings from a thermostat change, and if you call it a win you will chase the wrong fix next month.
Keep a short log with four entries per month: your kWh or therms, the thermostat schedule, the dates of your filter changes and maintenance, and the outside conditions you remember. Two years of that log tells you more about your house than any single estimate.
Then make a small monthly savings plan. Put the difference from one action toward a bigger one, like insulation or a heat pump tune-up. That is how one winter of small changes turns into a permanently lower bill.
How to verify: after three months, compare the total usage against the same three months of last year, and note anything that moved in the wrong direction.
Common Mistakes
Running a space heater as a substitute for central heat. Heating a single room can cost more than a moderately set whole-house furnace, and an unattended heater is a fire risk. Use the system you have, at a sensible setting.
Covering radiators or blocking vents to redirect heat. Covering radiators traps heat and can damage the equipment over time. Closing vents in unused rooms sends air to rooms you are not heating and pulls air past the furnace, which shortens its life. Close doors instead, and keep every vent clear.
Assuming one thermostat number works for every house. A leaky rental in a cold climate and a tight new-build need different settings. Change it, live with it a few days, then adjust to your own comfort instead of chasing someone else’s number.
Comparing bills without adjusting for weather. Heating degree days vary year to year, and so do household guests, holidays and a longer billing cycle. Compare usage per period, and factor in the weather before declaring a failure.
Putting a smart thermostat in learning mode before the manual schedule works. The system learns from what the occupants do. Start with a fixed schedule, confirm it, then let it learn. Forum complaints about doubled bills usually trace back to a schedule nobody actually set.
Setting the water heater below 120 degrees. It saves a little and creates a real hygiene risk. Leave it at 120 or above and get the savings from usage and insulation instead.
Two safety rules apply to every step above: gas work, flue changes, new thermostat wiring and anything structural go to a licensed professional, and you should never seal or block a combustion vent.
Frequently Asked Questions
How much should my electric bill be in the winter?
There is no single normal number, because it depends on home size, insulation, heating fuel and how hard the winter was. A better approach: track your own kilowatt-hour or therm usage for three years and compare this winter to your own average rather than to a national figure. Forum households report using two to three thousand kWh a month with all-electric heat, while gas-heated homes in the same climate use far less electricity. Check that your bill length matches the days it covers, since a long cycle around the holidays reads as a spike.
Why is my electric bill so high with a heat pump?
Almost always because the backup resistance heat is running alongside the compressor. Heat pumps lose efficiency as outdoor temperatures fall, so the system calls for auxiliary heat strips at its lockout temperature, and resistance heat costs several times more to run than the compressor. Check whether the aux indicator lights up during cold nights, confirm the lockout setting is not set too low, and keep filters clean so the compressor can carry the load. If aux heat runs constantly, that points to a refrigerant, sizing, or ductwork problem worth a technician’s visit.
How much money can you save by turning down the thermostat?
The Department of Energy has long cited roughly 10 percent annual heating savings from an eight-hour setback of seven to ten degrees, and smaller setbacks deliver smaller returns. Your real number depends on how much heat leaves your house and how you heat. In a tight home with a heat pump, the thermostat change matters less than sealing the air leaks. In a leaky rental with electric resistance heat, the thermostat is the fastest lever you have. Change it and measure rather than assuming.
Does turning off lights really save energy?
For modern LED bulbs, the savings are small, often only a fraction of a cent per hour. With older incandescent or halogen bulbs, leaving them on costs several times more than switching them off. The bigger win is what people miss: electronics, set-top boxes, chargers, game consoles, printers and old TVs draw standby power continuously, which adds up to meaningful annual usage. Switching to LEDs and unplugging or smart-stripping those standby loads usually matters more than the light switches.
What wastes the most electricity in an apartment?
In most apartments, space heating is the largest controllable load, followed by the water heater and then the heating ductwork in the unit. Specific apartment problems include blocked or undersized supply vents, a thermostat the landlord set too high, running an electric oven for extra heat, and older windows and door frames leaking heavily. Renters report noticeable improvement from rolled towels along exterior doors, thermal curtains, and a cooler water heater setting. Permanent fixes belong to the landlord, so keep notes and ask in writing.
How do I get my utility company to do a free energy audit?
Most US utilities offer some form of free or discounted audit, and weatherization assistance programs for low-income households go further and pay for air sealing and insulation. Call the number on your bill and ask specifically about energy audits, weatherization assistance, budget billing and any rebates for insulation, windows, heat pumps or smart thermostats. Find the programs page on the utility website, because eligibility rules and deadlines vary and many funds run out mid-season.
Start With Your Next Bill
Pull out your last bill and identify the single largest line you can control. Set the thermostat to a schedule that suits your household this week. Do a flashlight pass for air leaks and note every gap you find.
Then put a filter change on your calendar and call your utility to ask about an audit, budget billing, and weatherization assistance. Those four things cost nothing and cover most of what a paid contractor would tell you in the first hour anyway.
For larger work like insulation, duct sealing or a heat pump tune-up, get a written assessment first. Log your usage every month and you will know within one billing cycle which changes actually paid back.